
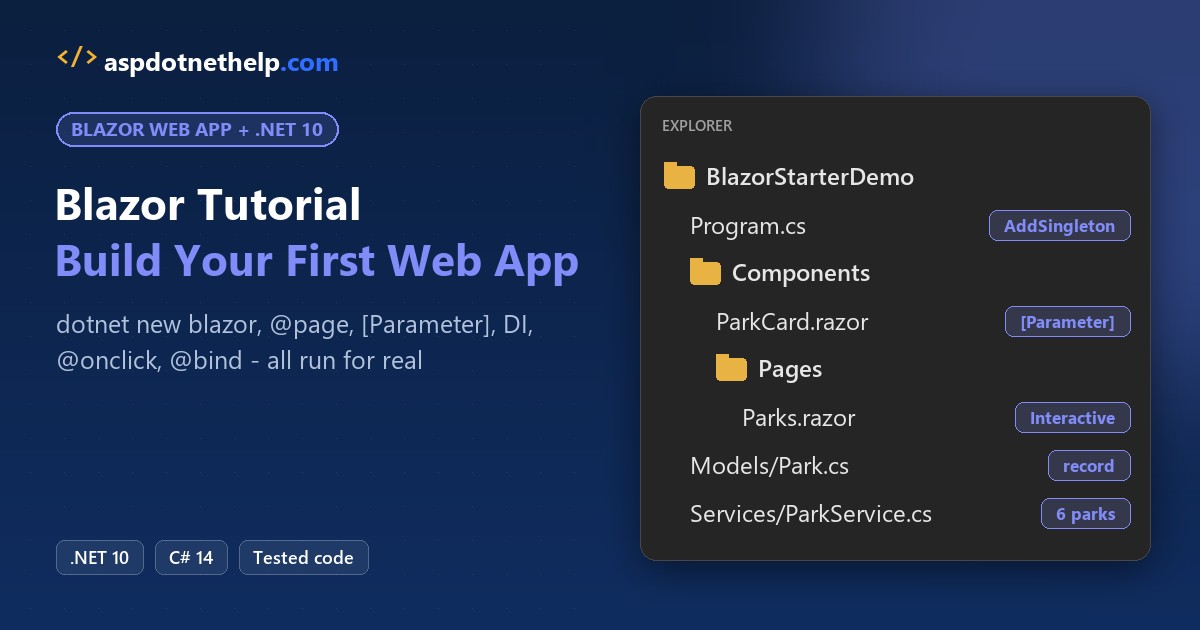
The first wall most people hit in a Blazor tutorial is a button that does nothing. You add @onclick to a new page in a dotnet new blazor app, click it, and the count never moves, because new pages render as static HTML.
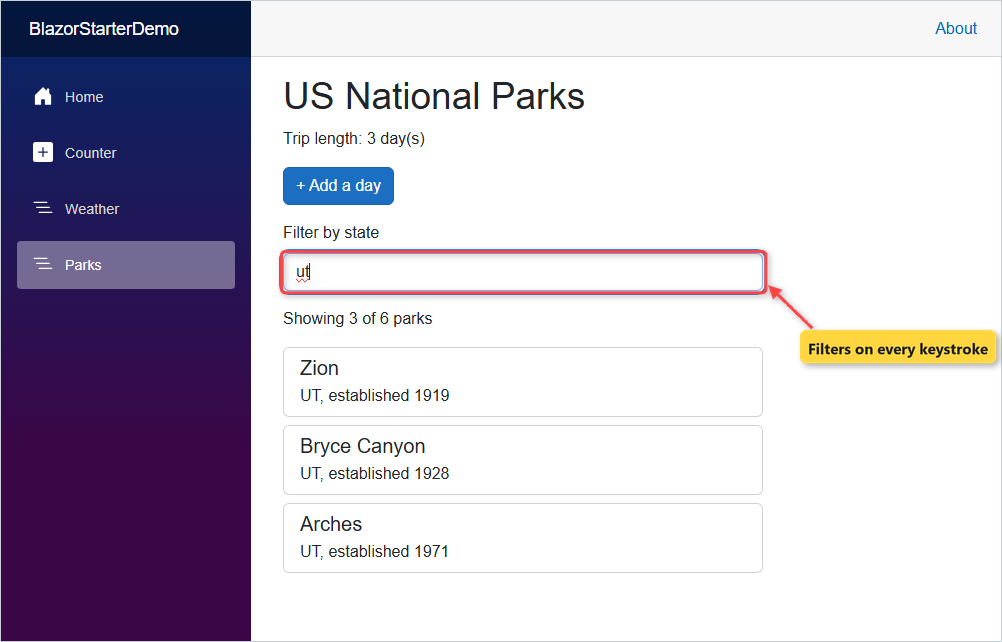
The fix is one line: @rendermode InteractiveServer. We’ll build a small national parks planner on .NET 10 with a routed page, a component, a C# service, that button and a live filter box.
Here’s what we’re building:
Before You Start the Blazor Tutorial
You need the .NET 10 SDK (I used 10.0.402) and an editor. Run dotnet --version first; if it’s not 10.x, see how to check your .NET version. I use VS Code, set up as in my VS Code console app guide.
Our sample data is six US national parks. It lives in a C# service, so no database is needed:
| Park | State | Established |
|---|---|---|
| Yellowstone | WY | 1872 |
| Yosemite | CA | 1890 |
| Zion | UT | 1919 |
| Grand Canyon | AZ | 1919 |
| Bryce Canyon | UT | 1928 |
| Arches | UT | 1971 |
Step 1: Create a Blazor Web App with dotnet new blazor
Open a terminal in the folder where your projects live and create the app. blazor is the short name of the Blazor Web App template:
dotnet new blazor -o BlazorStarterDemo
cd BlazorStarterDemo
dotnet run
Here’s what the template printed on my machine:
The template "Blazor Web App" was created successfully.
This template contains technologies from parties other than Microsoft, see https://aka.ms/aspnetcore/10.0-third-party-notices for details.

Processing post-creation actions...
Restoring C:\DotNetDemo\BlazorStarterDemo\BlazorStarterDemo.csproj:
  Determining projects to restore...
  Restored C:\DotNetDemo\BlazorStarterDemo\BlazorStarterDemo.csproj (in 697 ms).
Restore succeeded.
Its help text explains the trap from the intro. --interactivity defaults to Server, and --all-interactive defaults to false, so “pages will use static server rendering by default” unless you mark them interactive.
I changed the two ports in Properties/launchSettings.json to 5251 and 7251 so they’re easy to remember. dotnet run uses the first profile, http:
{
  "$schema": "https://json.schemastore.org/launchsettings.json",
    "profiles": {
      "http": {
        "commandName": "Project",
        "dotnetRunMessages": true,
        "launchBrowser": true,
        "applicationUrl": "http://localhost:5251",
        "environmentVariables": {
          "ASPNETCORE_ENVIRONMENT": "Development"
        }
      },
      "https": {
        "commandName": "Project",
        "dotnetRunMessages": true,
        "launchBrowser": true,
        "applicationUrl": "https://localhost:7251;http://localhost:5251",
        "environmentVariables": {
          "ASPNETCORE_ENVIRONMENT": "Development"
        }
      }
    }
  }
dotnet run builds the app and starts the Kestrel web server:
Using launch settings from C:\DotNetDemo\BlazorStarterDemo\Properties\launchSettings.json...
Building...
info: Microsoft.Hosting.Lifetime[14]
      Now listening on: http://localhost:5251
info: Microsoft.Hosting.Lifetime[0]
      Application started. Press Ctrl+C to shut down.
info: Microsoft.Hosting.Lifetime[0]
      Hosting environment: Development
info: Microsoft.Hosting.Lifetime[0]
      Content root path: C:\DotNetDemo\BlazorStarterDemo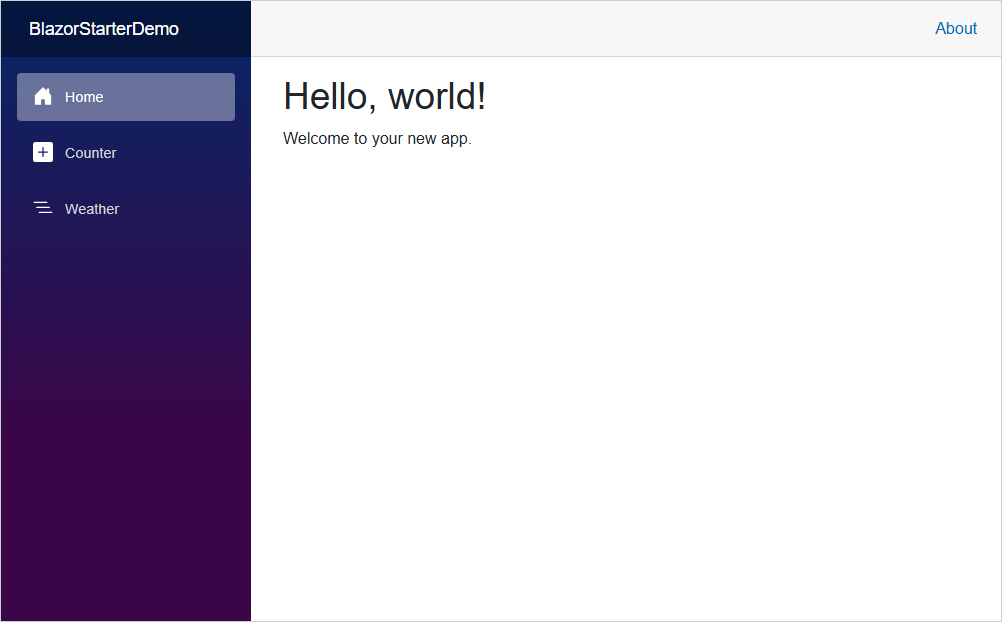
Note: skip the old blazorserver template. On my PC it only offers net6.0 and net7.0, both long out of .NET support. Blazor Server lives on as the Interactive Server render mode.
Checkpoint: the terminal shows Now listening on: http://localhost:5251, and the browser shows “Hello, world!”.
Step 2: Take the Blazor Project Tour
Stop the app with Ctrl+C and open the folder in your editor. Everything you’ll touch sits in Program.cs and the Components folder:
C:\DOTNETDEMO\BLAZORSTARTERDEMO\COMPONENTS
|   App.razor
|   Routes.razor
|   _Imports.razor
|
+---Layout
|       MainLayout.razor
|       MainLayout.razor.css
|       NavMenu.razor
|       NavMenu.razor.css
|       ReconnectModal.razor
|       ReconnectModal.razor.css
|       ReconnectModal.razor.js
|
\---Pages
        Counter.razor
        Error.razor
        Home.razor
        NotFound.razor
Weather.razor| File or folder | What it does |
|---|---|
Program.cs | Registers services (AddRazorComponents, AddInteractiveServerComponents) and maps the app |
Components/App.razor | The HTML shell: <head>, the <Routes /> component and the blazor.web.js script |
Components/Routes.razor | The router: finds the page whose @page matches the URL and wraps it in MainLayout |
Components/Pages/ | Routable pages: Home, Counter, Weather, Error, NotFound |
Components/Layout/ | MainLayout (sidebar + body) and NavMenu (the links) |
Components/_Imports.razor | @using lines shared by every component |
wwwroot/ | Static files: Bootstrap, app.css, favicon |
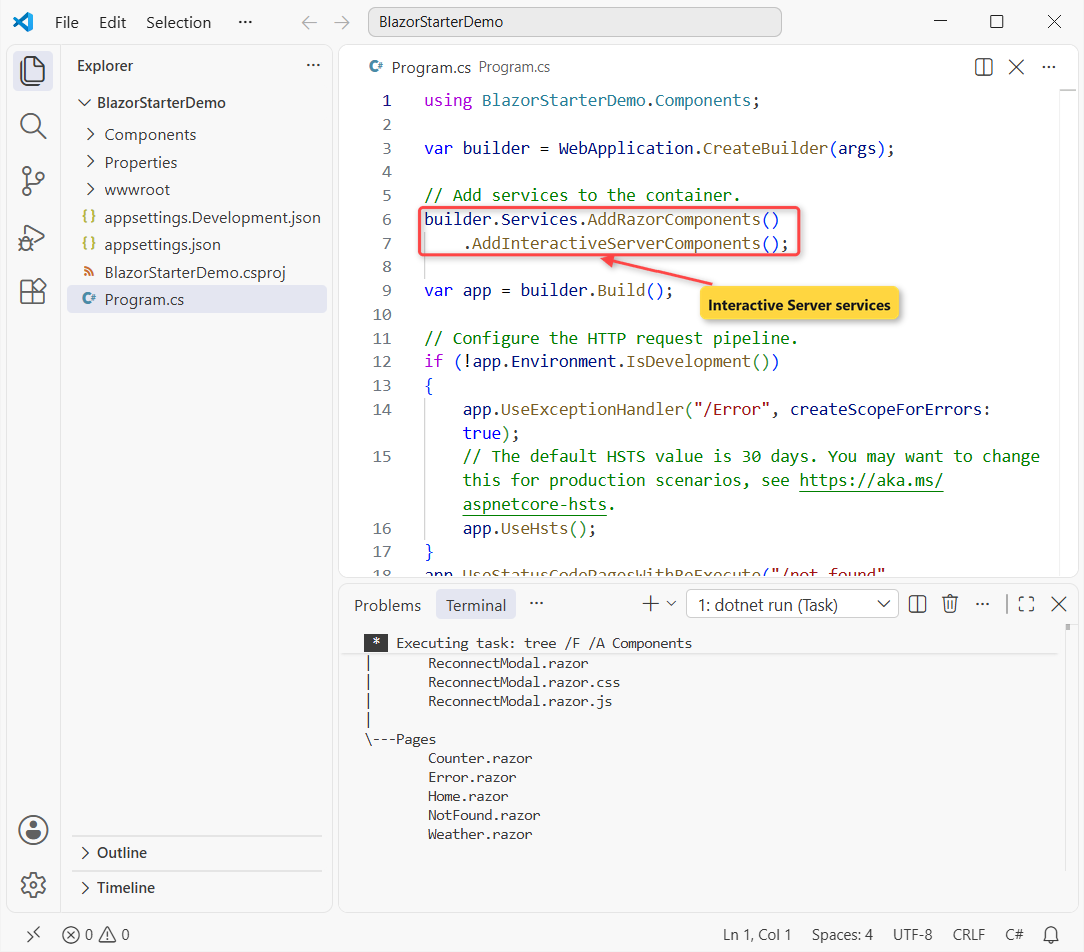
Here’s the template’s Program.cs. The lines that matter for interactivity are the service call near the top and the endpoint call at the bottom:
using BlazorStarterDemo.Components;

var builder = WebApplication.CreateBuilder(args);

// Add services to the container.
builder.Services.AddRazorComponents()
    .AddInteractiveServerComponents();

var app = builder.Build();

// Configure the HTTP request pipeline.
if (!app.Environment.IsDevelopment())
{
    app.UseExceptionHandler("/Error", createScopeForErrors: true);
    // The default HSTS value is 30 days. You may want to change this for production scenarios, see https://aka.ms/aspnetcore-hsts.
    app.UseHsts();
}
app.UseStatusCodePagesWithReExecute("/not-found", createScopeForStatusCodePages: true);
app.UseHttpsRedirection();

app.UseAntiforgery();

app.MapStaticAssets();
app.MapRazorComponents<App>()
    .AddInteractiveServerRenderMode();

app.Run();
The project file is short. Microsoft.NET.Sdk.Web pulls in ASP.NET Core, and the target is net10.0, the .NET 10 LTS release:
<Project Sdk="Microsoft.NET.Sdk.Web">

  <PropertyGroup>
    <TargetFramework>net10.0</TargetFramework>
    <Nullable>enable</Nullable>
    <ImplicitUsings>enable</ImplicitUsings>
    <BlazorDisableThrowNavigationException>true</BlazorDisableThrowNavigationException>
  </PropertyGroup>

</Project>
The two settings files only set log levels. I left them as the template wrote them, appsettings.json first, then appsettings.Development.json:
{
  "Logging": {
    "LogLevel": {
      "Default": "Information",
      "Microsoft.AspNetCore": "Warning"
    }
  },
  "AllowedHosts": "*"
}
{
"Logging": {
"LogLevel": {
"Default": "Information",
"Microsoft.AspNetCore": "Warning"
}
}
}
The @using BlazorStarterDemo.Components lines in _Imports.razor are plain C# namespaces, the same idea as namespaces in C#.
Checkpoint: you can find Routes.razor, App.razor and the Pages folder in your own tree.
Step 3: Add a New Blazor Page with @page
Every page is a .razor file with a @page route at the top. Create Components/Pages/Parks.razor:
@page "/parks"

<PageTitle>National Parks</PageTitle>

<h1>US National Parks</h1>

<p>Plan a road trip through six parks in the American West.</p>
Then add a link to it in Components/Layout/NavMenu.razor, right before the closing </nav> tag:
        <div class="nav-item px-3">
            <NavLink class="nav-link" href="parks">
                <span class="bi bi-list-nested-nav-menu" aria-hidden="true"></span> Parks
            </NavLink>
        </div>
Run dotnet run again. I fetched both URLs with curl: /parks returned 200 with <h1>US National Parks</h1>, and the typo /park returned 404.
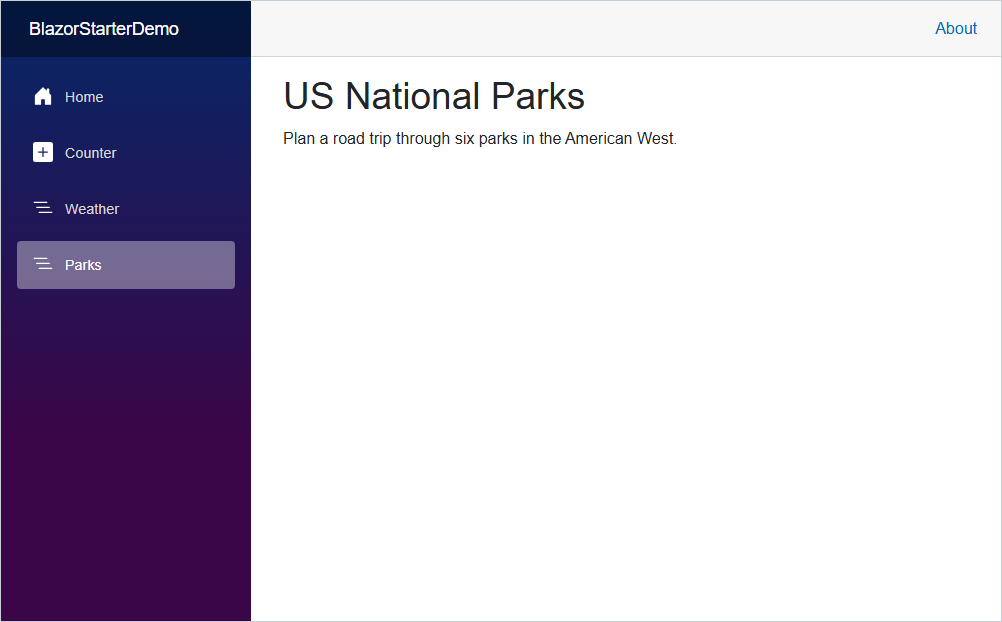
Checkpoint: the sidebar has a Parks link, and it opens the US National Parks heading.
Step 4: Build a Blazor Component with [Parameter]
A component is a .razor file without @page. First, a record for one park in Models/Park.cs:
namespace BlazorStarterDemo.Models;

public record Park(string Name, string State, int Established);
That one line is a type with a constructor and three read-only properties. Now the card, Components/ParkCard.razor:
@using BlazorStarterDemo.Models

<div class="card mb-2" style="max-width: 30rem;">
    <div class="card-body py-2">
        <h5 class="card-title mb-1">@Park.Name</h5>
        <p class="card-text mb-0">@Park.State, established @Park.Established</p>
    </div>
</div>

@code {
    [Parameter, EditorRequired]
    public Park Park { get; set; } = default!;
}
[Parameter] makes Park settable from the parent’s markup, and EditorRequired warns at build time if a parent forgets it. Use the component on the page like an HTML tag:
@page "/parks"
@using BlazorStarterDemo.Models

<PageTitle>National Parks</PageTitle>

<h1>US National Parks</h1>

<ParkCard Park="@(new Park("Zion", "UT", 1919))" />
<ParkCard Park="@(new Park("Arches", "UT", 1971))" />
The build came back clean. This is what the VS Code terminal showed for it:
Restore complete (0.5s)
  BlazorStarterDemo net10.0 succeeded (0.9s) → bin\Debug\net10.0\BlazorStarterDemo.dll

Build succeeded in 2.4s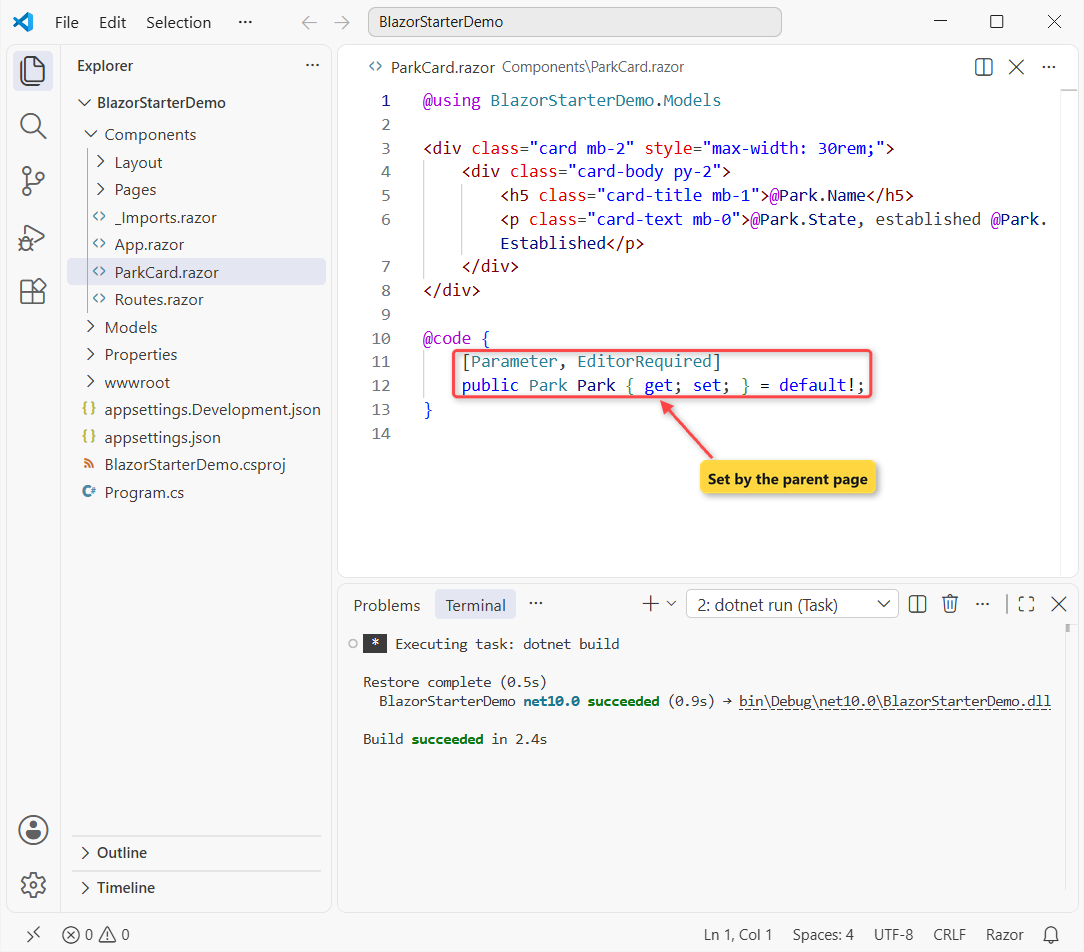
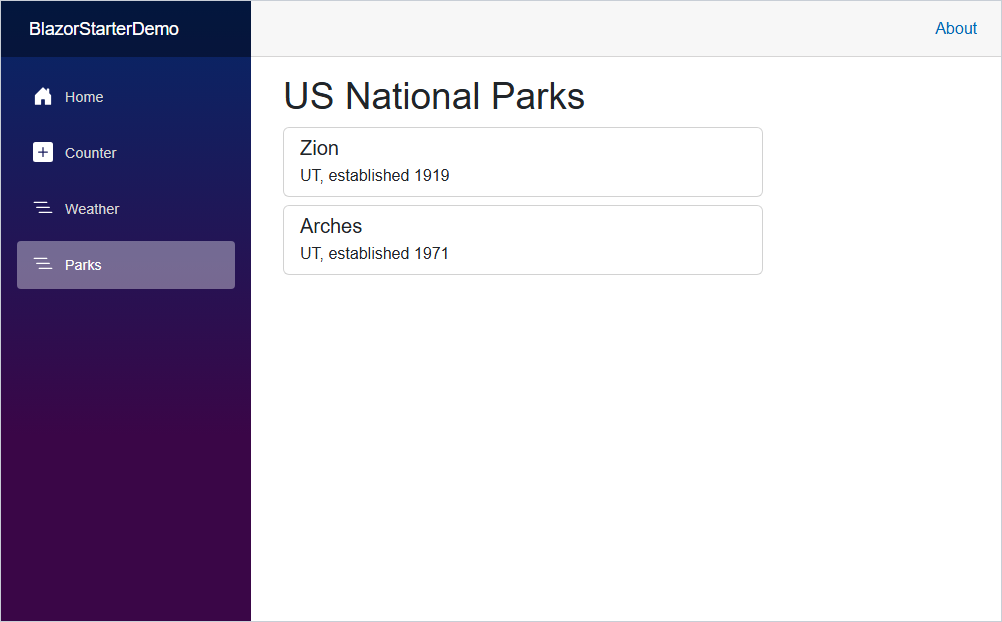
Checkpoint: two cards, Zion and Arches, each with its state and year.
Step 5: Load Blazor Data from a C# Service with Dependency Injection
Hard-coded cards don’t scale. Move the data into Services/ParkService.cs, a class holding a List in C# of parks:
using BlazorStarterDemo.Models;

namespace BlazorStarterDemo.Services;

public class ParkService
{
    private readonly List<Park> parks =
    [
        new("Yellowstone", "WY", 1872),
        new("Yosemite", "CA", 1890),
        new("Zion", "UT", 1919),
        new("Grand Canyon", "AZ", 1919),
        new("Bryce Canyon", "UT", 1928),
        new("Arches", "UT", 1971),
    ];

    public IReadOnlyList<Park> GetAll() => parks;
}
Inject it into the page with @inject, load it in OnInitialized and render one card per park with @foreach:
@page "/parks"
@using BlazorStarterDemo.Models
@using BlazorStarterDemo.Services
@inject ParkService ParkService

<PageTitle>National Parks</PageTitle>

<h1>US National Parks</h1>

<p>@parks.Count parks loaded from ParkService</p>

@foreach (var park in parks)
{
    <ParkCard Park="park" />
}

@code {
    private IReadOnlyList<Park> parks = [];

    protected override void OnInitialized()
    {
        parks = ParkService.GetAll();
    }
}
Razor’s @foreach is the regular foreach loop mixed with markup. Run it now and the page fails, because nobody told DI about the service. I got a 500:
System.InvalidOperationException: Cannot provide a value for property 'ParkService' on type 'BlazorStarterDemo.Components.Pages.Parks'. There is no registered service of type 'BlazorStarterDemo.Services.ParkService'.Register it in Program.cs. Here’s the full file after the change, with one using and one AddSingleton line added:
using BlazorStarterDemo.Components;
using BlazorStarterDemo.Services;

var builder = WebApplication.CreateBuilder(args);

// Add services to the container.
builder.Services.AddRazorComponents()
    .AddInteractiveServerComponents();

builder.Services.AddSingleton<ParkService>();

var app = builder.Build();

// Configure the HTTP request pipeline.
if (!app.Environment.IsDevelopment())
{
    app.UseExceptionHandler("/Error", createScopeForErrors: true);
    // The default HSTS value is 30 days. You may want to change this for production scenarios, see https://aka.ms/aspnetcore-hsts.
    app.UseHsts();
}
app.UseStatusCodePagesWithReExecute("/not-found", createScopeForStatusCodePages: true);
app.UseHttpsRedirection();

app.UseAntiforgery();

app.MapStaticAssets();
app.MapRazorComponents<App>()
    .AddInteractiveServerRenderMode();

app.Run();
AddSingleton is fine here because the list never changes. A service that talks to a database for each user would use AddScoped.
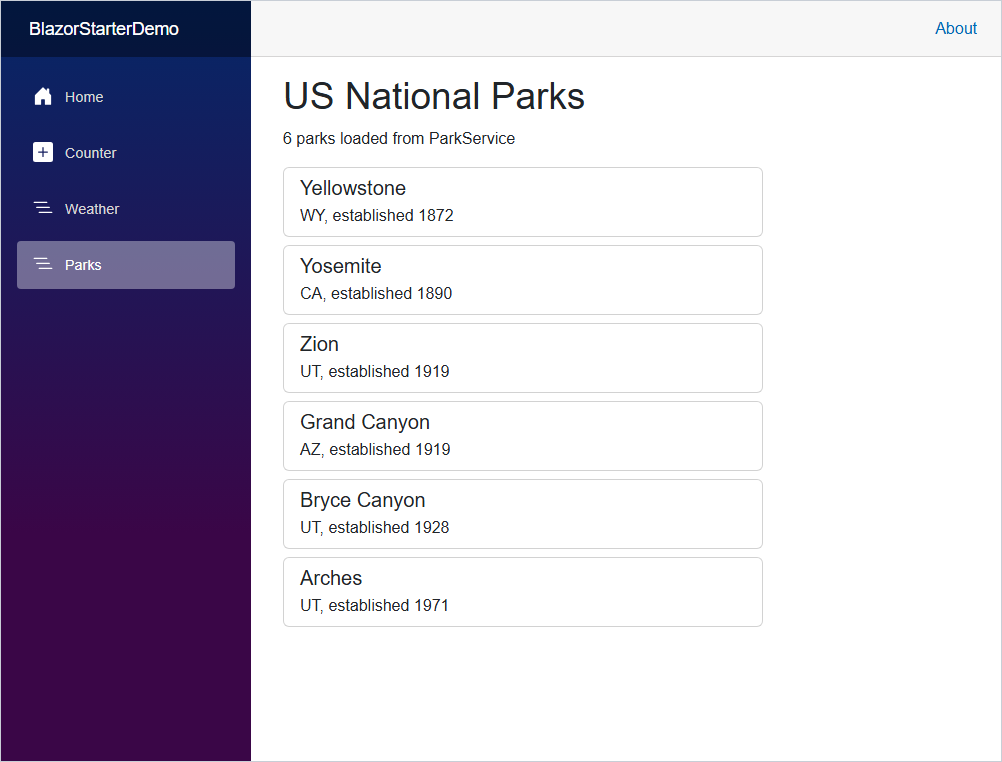
Checkpoint: “6 parks loaded from ParkService” and six cards from Yellowstone to Arches.
Step 6: Make a Blazor @onclick Button Work with @rendermode InteractiveServer
Now the button. Add this markup above the @foreach, plus a counter field and a method in @code:
<p role="status">Trip length: @tripDays day(s)</p>
<button class="btn btn-primary mb-3" @onclick="AddDay">+ Add a day</button>

@code {
    private int tripDays = 1;

    private void AddDay() => tripDays++;
}
Run it and click. Nothing happens: after two clicks in headless Edge, the page still read “Trip length: 1 day(s)”.
The HTML from curl shows why: <button class="btn btn-primary mb-3">+ Add a day</button>. There’s no handler and no Blazor connection, just HTML.
Add one line under @page:
@page "/parks"
@rendermode InteractiveServer
Same two clicks, and it read “Trip length: 3 day(s)”. The browser console logged WebSocket connected to ws://localhost:5251/_blazor?id=.... That’s the SignalR circuit that sends each click to the server, which runs AddDay and sends back the changed HTML.

An @onclick is a C# event handler, much like the events in C# you’d wire up in a desktop app. It just needs a live connection to run.
Checkpoint: each click adds a day once the page has the render mode.
Step 7: Bind a Filter Box with @bind in Blazor
Last, a text box that filters the list by state. @bind keeps the box and the stateFilter field in sync. Here’s the finished Parks.razor:
@page "/parks"
@rendermode InteractiveServer
@using BlazorStarterDemo.Models
@using BlazorStarterDemo.Services
@inject ParkService ParkService

<PageTitle>National Parks</PageTitle>

<h1>US National Parks</h1>

<p role="status">Trip length: @tripDays day(s)</p>
<button class="btn btn-primary mb-3" @onclick="AddDay">+ Add a day</button>

<div class="mb-3" style="max-width: 30rem;">
    <label class="form-label" for="state">Filter by state</label>
    <input id="state" class="form-control" placeholder="UT"
           @bind="stateFilter" @bind:event="oninput" />
</div>

<p>Showing @Filtered.Count() of @parks.Count parks</p>

@foreach (var park in Filtered)
{
    <ParkCard Park="park" />
}

@code {
    private IReadOnlyList<Park> parks = [];
    private int tripDays = 1;
    private string stateFilter = "";

    private IEnumerable<Park> Filtered =>
        string.IsNullOrWhiteSpace(stateFilter)
            ? parks
            : parks.Where(p => p.State.Equals(stateFilter.Trim(),
                  StringComparison.OrdinalIgnoreCase));

    protected override void OnInitialized()
    {
        parks = ParkService.GetAll();
    }

    private void AddDay() => tripDays++;
}
By default, @bind on an input updates on onchange, when the box loses focus. @bind:event="oninput" updates on every keystroke, so the list shrinks while you type. Filtered is a LINQ Where query that compares state codes ignoring case.
An empty box shows all parks, thanks to string.IsNullOrWhiteSpace (more in checking for null or empty strings).
In headless Edge I clicked twice and typed “ut”. The page then showed 3 cards: Zion, Bryce Canyon, Arches | Trip length: 3 day(s). Before typing, it had 6 cards.
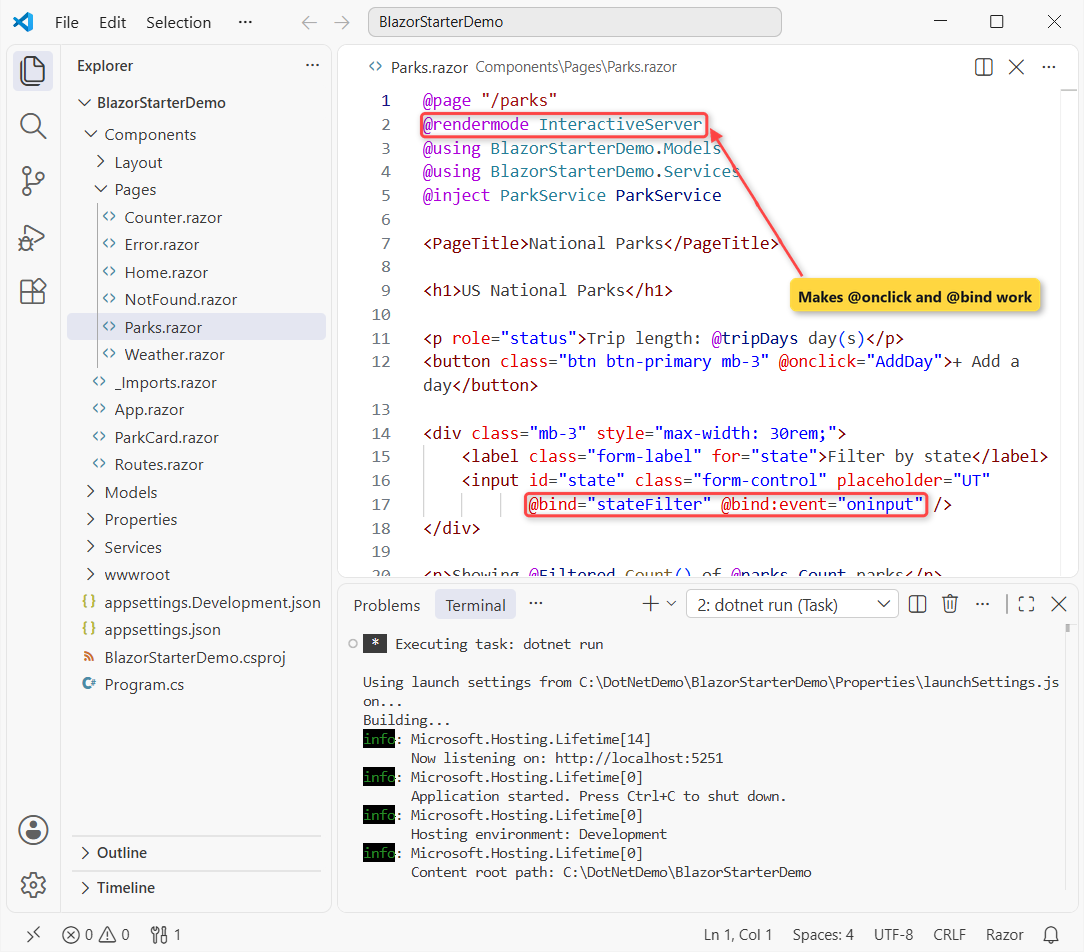
Checkpoint: typing “ut” leaves Zion, Bryce Canyon and Arches, and clearing the box brings back all six.
Test the Blazor Web App
Here’s every check I ran against the finished app on localhost:5251, with the real results:
| Check | How | Result |
|---|---|---|
/parks loads | curl | 200 |
Unknown route /park | curl | 404 |
| Button on a static SSR page | 2 clicks, headless Edge | Trip length: 1 day(s) |
Button with InteractiveServer | 2 clicks, headless Edge | Trip length: 3 day(s) |
Filter ut | typed, headless Edge | 3 cards: Zion, Bryce Canyon, Arches |
One detail surprised me. The interactive page still arrives as full HTML in curl, followed by a marker that starts with <!--Blazor:{"type":"server","prerender.... That’s prerendering, which is on by default, so the page shows up before the circuit connects.
It’s also why I wait 3 seconds before clicking: a click that lands before the WebSocket connects is lost. I test my ASP.NET Core OTP API the same way, with real requests.
Which Blazor Render Mode Should You Use?
Microsoft Learn lists four render modes for a Blazor Web App. The @using static Microsoft.AspNetCore.Components.Web.RenderMode line in _Imports.razor is why the short names work:
| Render mode | @rendermode value | Runs where | Interactive |
|---|---|---|---|
| Static Server (static SSR) | none (the default) | Server | No |
| Interactive Server | InteractiveServer | Server, over a SignalR circuit | Yes |
| Interactive WebAssembly | InteractiveWebAssembly | Browser (WebAssembly) | Yes |
| Interactive Auto | InteractiveAuto | Server first, then the browser | Yes |
I’d start with Interactive Server, as we did. WebAssembly and Auto need a separate .Client project, which you get with dotnet new blazor --interactivity WebAssembly or Auto.
Keep static SSR for pages that only show data, and add a mode where a page needs clicks or binding. More server-side topics are in my ASP.NET Core tutorials.
Troubleshooting Common Blazor Beginner Errors
The button does nothing. The page has no render mode, so it’s static SSR. Add @rendermode InteractiveServer under @page, or create the app with --all-interactive.
“Cannot provide a value for property ‘ParkService'”. The service isn’t registered, so add builder.Services.AddSingleton<ParkService>(); before builder.Build(). Registering an interface in C# instead lets you swap in a fake service for tests.
The list only filters after you click away. That’s plain @bind waiting for onchange. Add @bind:event="oninput".
The new page shows “Not found”. Check the @page line. A .razor file without it is a component, not a page.
Where to Take It Next with Blazor
Swap ParkService for real data from a web API. My OpenAPI and Scalar guide for ASP.NET Core builds that kind of backend.
Then try EditForm with validation, or QuickGrid for sorting. New posts land in the Blazor tutorials section.
A few more posts that help with the C# side of this app:
- Learn C# from the basics
- Upgrade a .NET 8 app to .NET 10
- New features in C# 14
- Handle exceptions with try-catch in C#
Frequently Asked Questions
Is Blazor C#?
Yes. Blazor components are .razor files that mix HTML with C#, and the logic in @code blocks is plain C#. You don’t need JavaScript for a basic Blazor web app.
What is the difference between Blazor and Razor?
Razor is the syntax for mixing C# into HTML. Razor Pages and MVC views use it to render pages on the server. Blazor uses the same syntax for components that can also be interactive.
Is Blazor Server still supported in .NET 10?
Yes, as the Interactive Server render mode of a Blazor Web App. Create new apps with dotnet new blazor instead of the old blazorserver template. See ASP.NET Core Blazor render modes on Microsoft Learn.
How do I start a Blazor app?
Install the .NET 10 SDK, run dotnet new blazor -o MyApp, then cd MyApp and dotnet run. Open the http://localhost URL that the terminal prints.
Why doesn’t my Blazor button click work?
The page is rendered with static SSR, the default for new pages. Add @rendermode InteractiveServer to the page, or turn on global interactivity when you create the app.
Should I learn Blazor WebAssembly or Blazor Server first?
Start with Interactive Server. It needs one project and starts fast. Move a component to WebAssembly later if it should run in the browser.

Bijay Kumar is a renowned software engineer, accomplished author, and distinguished Microsoft Most Valuable Professional (MVP) specializing in SharePoint. With a rich professional background spanning over 15 years, Bijay has established himself as an authority in the field of information technology. He possesses unparalleled expertise in multiple programming languages and technologies such as ASP.NET, ASP.NET MVC, C#.NET, and SharePoint, which has enabled him to develop innovative and cutting-edge solutions for clients across the globe. Read more…