
Recently, I worked on a Windows Forms app for a client. They needed a simple tool to send emails with file attachments.
The idea was simple: users should be able to enter an email address, subject, message, attach a file, and hit Send. Sounds simple, right? But as always, there were a few challenges, especially when connecting the Outlook SMTP server correctly and avoiding authentication errors.
In this tutorial, I will show you how to create a simple C# WinForms application that lets users send emails with file attachments using the Outlook SMTP server. I will also tell you how to send an email using a Gmail or Yahoo account.
Windows Forms App to Send Emails with Attachments
Here, you will learn how to design a clean form, connect the SMTP client correctly, and attach files with just a few lines of code.
To send an email, we use SMTP (Simple Mail Transfer Protocol), a protocol for sending and receiving emails. We are required to send two things to send an email through SMTP:
- SMTP Server
- PORT
Now follow the steps below:
Create a New Windows Forms App Project
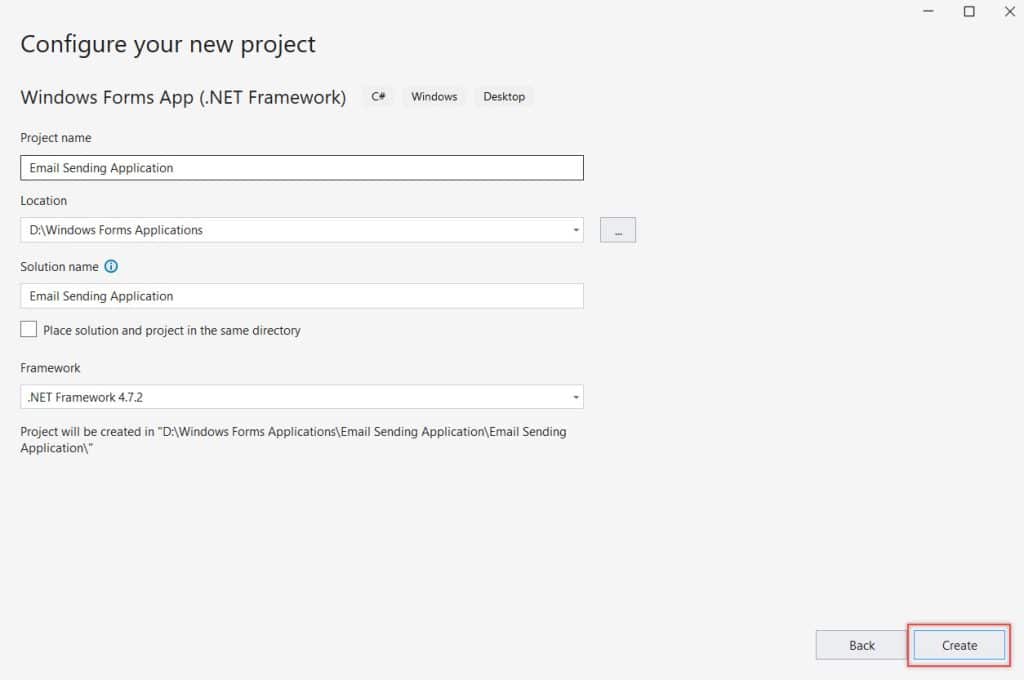
Follow the steps below to create a new Windows Form project using Visual Studio.
- Now, open Visual Studio (not Visual Studio Code).
- Go to File -> New -> Project.
- Select Windows Forms App (.NET Framework).
- Name your project something like Email Sending Application. Then click Create.
Design the Form
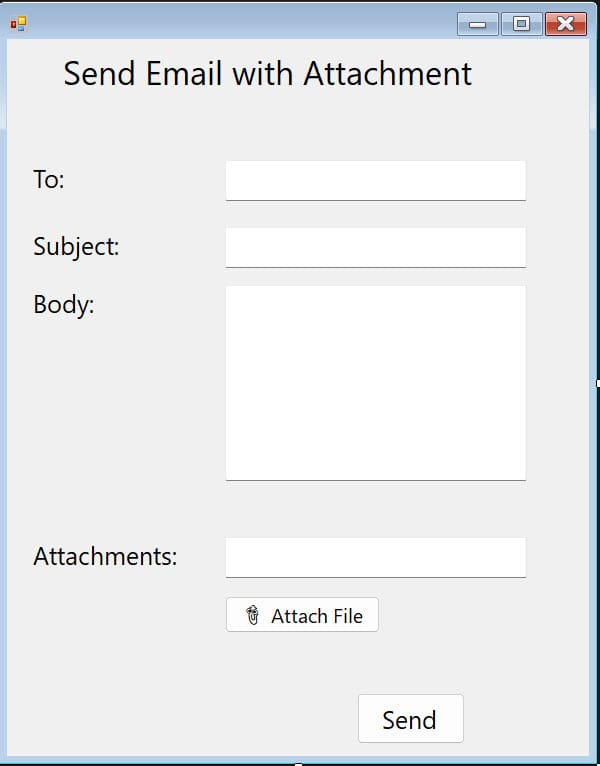
Now, drag and drop the controls below from the Toolbox onto your form. Then, change their names and text.
| Control Type | Name | Text |
|---|---|---|
| Label | label1 | Send Email with Attachment |
| Label | label2 | To: |
| TextBox | To | |
| Label | label3 | Subject: |
| TextBox | subject | |
| Label | label4 | Body: |
| TextBox (Multiline) | body | |
| Label | label5 | Attachments: |
| TextBox | attName | |
| Button | button3 | Attach File |
| Button | button1 | Send |
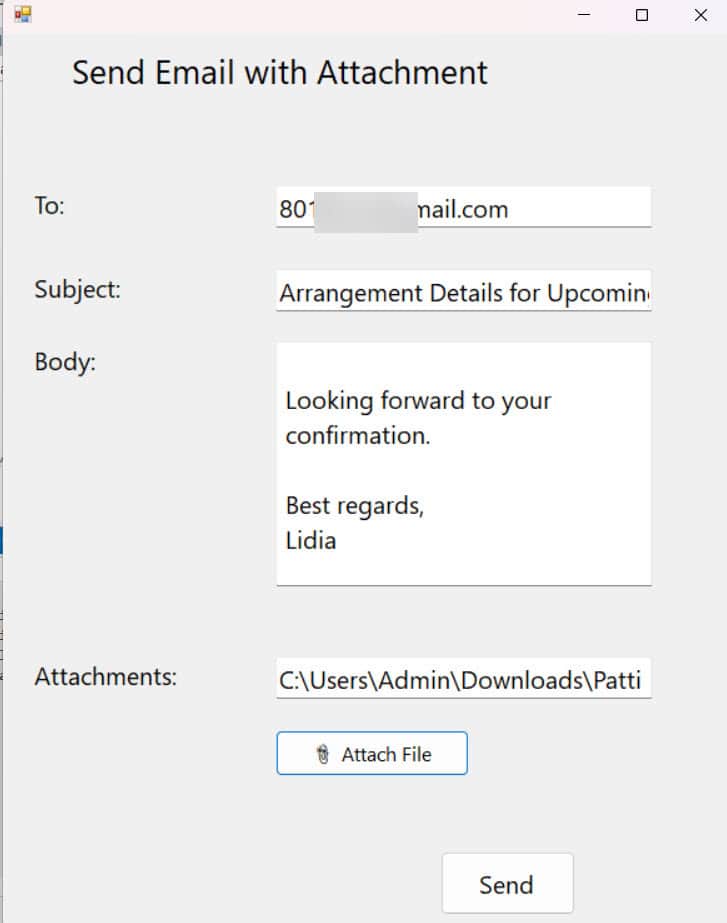
Then, adjust the size and location in the form, and it should look like the screenshot below.
Add the Required Code
When writing code in C#, we must tell the program which libraries (namespaces) we use. These namespaces contain predefined classes and methods that make your life easier.
In this case, since we are building an app to send emails, we need access to certain classes, such as MailMessage, SmtpClient, NetworkCredential, and more.
So at the very top of our Form1.cs file, add these two lines:
using System.Net;
using System.Net.Mail;
Now we need to write the logic that sends the email when the user clicks the “Send” button.
- To do this, double-click the Send button (button1), which will redirect to the form1.cs with the following code:
 private void button1_Click(object sender, EventArgs e)
 {
}- Then, add the code below inside the top button event to check if the user has filled in the required fields.
if (string.IsNullOrWhiteSpace(To.Text) || string.IsNullOrWhiteSpace(subject.Text) || string.IsNullOrWhiteSpace(body.Text))
{
    MessageBox.Show("Please fill in all fields.");
    return;
}- Next, we will write the create MailMessage object:
MailMessage mail = new MailMessage(from, to, subject, body);
Here:
- from: Your email address (sender). In my case, I want the sender to be the same, so I directly add the email address. If you want the sender to change every time, create another text box for the from.
- to: Recipient’s email
- subject: Email subject
- body: Email content
- Then, create another object for attachment by using the code below. If the user has selected a file, it adds it as an attachment to the email.
Add attachment if provided
    if (!string.IsNullOrWhiteSpace(attName.Text))
    {
        mail.Attachments.Add(new Attachment(attName.Text));
}- Now we need to tell the code which SMTP and port we will use. In my case, I only want to send from Outlook, so I used the following code:
SmtpClient client = new SmtpClient("smtp.outlook.com")
{
    Port = 587,
    Credentials = new NetworkCredential("Sender Email Address", "Sender Email Address password"),
    EnableSsl = true
};
Here:
- smtp.outlook.com: The SMTP server for Outlook
- Port 587: Required port for STARTTLS
- EnableSsl = true: Enables encryption (security)
- NetworkCredential: Logs in with your email and password
- Then we need to send an email. We need to connect to the SMTP server and deliver the message. Use the code below:
client.Send(mail);
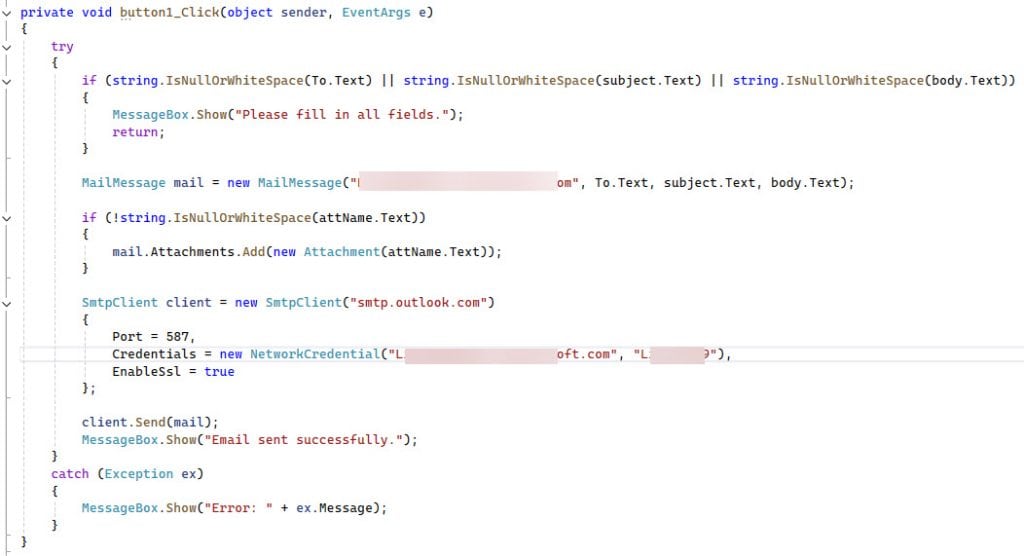
- For error handling, put all the above code into a try block. In the catch block, add a message box to show the error. Then, the final code looks like this:
try
{
    if (string.IsNullOrWhiteSpace(To.Text) || string.IsNullOrWhiteSpace(subject.Text) || string.IsNullOrWhiteSpace(body.Text))
    {
        MessageBox.Show("Please fill in all fields.");
        return;
    }

    MailMessage mail = new MailMessage("YourEmail@domain.com", To.Text, subject.Text, body.Text);

    if (!string.IsNullOrWhiteSpace(attName.Text))
    {
        mail.Attachments.Add(new Attachment(attName.Text));
    }

    SmtpClient client = new SmtpClient("smtp.outlook.com")
    {
        Port = 587,
        Credentials = new NetworkCredential("YourEmail@domain.com", "YourEmailPassword"),
        EnableSsl = true
    };


    client.Send(mail);
    MessageBox.Show("Email sent successfully.");
}
catch (Exception ex)
{
    MessageBox.Show("Error: " + ex.Message);
}
Till now, we have added the code to send an email, but we have not added any code to select the attachment.
Our app needs to allow users to browse and select a file from their computer. This is where the File Picker (also called OpenFileDialog) comes in.
Without this feature, users would have to manually type the full path to a file, which is not user-friendly.
Let’s follow the steps below:
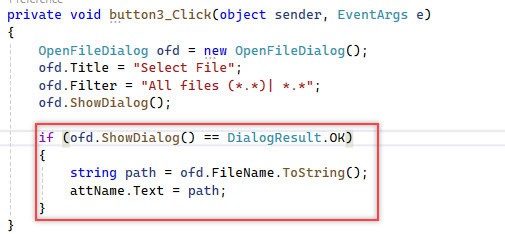
- To do this, double-click the Attach File button (button3), which will redirect to the form1.cs with the following code:
private void button3_Click(object sender, EventArgs e)
{
}- Then, add the code below inside the top button event to create the file picker dialog.
OpenFileDialog openFileDialog = new OpenFileDialog();This creates a file browser dialog that lets users navigate their folders and select a file.
- Next, add the code below to set the title and filter:
openFileDialog.Title = "Select a file to attach";
openFileDialog.Filter = "All Files (*.*)|*.*";
Here:
- Title: This is the dialog title shown at the top.
- Filter: This determines what file types are visible. In this case, it shows all files, but you can restrict it to .pdf, .docx, etc.
- Now, add the below code to display the file picker dialog box.
ofd.ShowDialog();- Then I need to show the attachment path in a text box, so add the below code:
if (ofd.ShowDialog() == DialogResult.OK)
{
    string filePath = ofd.FileName;
    attName.Text = filePath;
}
Here:
- ofd.ShowDialog() displays the file dialog.
- If the user selects a file and clicks “Open”, the dialog returns DialogResult.OK.
- Then you can safely use ofd.FileName to get the selected file path.
Test the Application
- Now, click the Save all button to save the code. To run the application, click Start Without Debugging. You can also click Start to debug the application.
- Then, enter the recipient’s email address, subject, and message.
- Click Attach File to choose a file. Click Send.
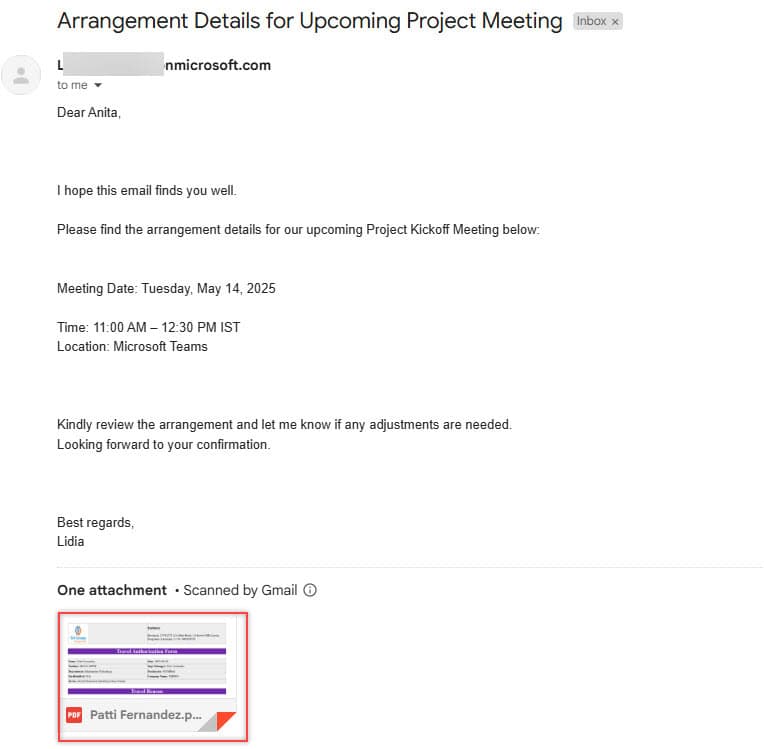
Then you can see the below email, the receiver will receive:
Using Gmail or Yahoo SMTP Servers
Here is how you can adjust the SMTP client for other providers:
Gmail:
SmtpClient client = new SmtpClient("smtp.gmail.com")
{
    Port = 587,
    Credentials = new NetworkCredential("yourgmail@gmail.com", "yourpassword"),
    EnableSsl = true
};
Yahoo:
SmtpClient client = new SmtpClient("smtp.mail.yahoo.com")
{
    Port = 587,
    Credentials = new NetworkCredential("youryahoo@yahoo.com", "yourpassword"),
    EnableSsl = true
};
Now, you can build a fully functional Windows Forms application that sends emails with attachments using Outlook, Gmail, or Yahoo SMTP servers.
You may like the following tutorials:
- Convert int to double with 2 Decimal Places in C#
- Constructor in C# with Real-Time Example
- How to Use Try Catch in C# with Example
Bijay Kumar is a renowned software engineer, accomplished author, and distinguished Microsoft Most Valuable Professional (MVP) specializing in SharePoint. With a rich professional background spanning over 15 years, Bijay has established himself as an authority in the field of information technology. He possesses unparalleled expertise in multiple programming languages and technologies such as ASP.NET, ASP.NET MVC, C#.NET, and SharePoint, which has enabled him to develop innovative and cutting-edge solutions for clients across the globe. Read more…